Posts

Showing posts from February, 2022

Neon Light Button Animation using HTML & CSS

Image
This article will help you to know how to create Neon Light Button Animation using HTML and CSS. neon button animation is a colorful button animation . This makes ordinary buttons much more attractive and beautiful. Buttons we all use in different projects or web pages. However, if it is animated, it enhances the beauty of the webpage. Here I have created a button to which I have added neon animation. In the case of neon button animation , the animation is created by combining different types of colors together. Here I first created a button using text and used four colorful lines around that button. Which combined with each other to create CSS glow effect animation . I only used HTML and CSS to make it. I have added the required information using HTML. I have designed the Neon Light Button with the help of CSS. Neon Button Animation CSS Below I have given a preview that will help you to know how this project works. Here you will find the required source code. However, I have share

Simple Image Hover Effects using HTML & CSS

Image
In this article, I have shown you how to create Simple Image Hover Effects using HTML and CSS. Earlier I shared with you many more tutorials on CSS Image Hover Effects . This type of Simple Image Hover is important for you if you are a beginner.  Here I have shared the completed step-by-step tutorial and the required source code. First I made a box at the top of the web page in which I put the images. When you click on that image, the image will split in two from the middle. As a result, the image on the back can be seen.  That is, two layers of the image have been used here. The first layer will move on both sides and the second layer will be visible. Simple Image Hover Effects This Image Hover effect is simple enough and suitable for use in any work. Here I have basically used three images. Under normal circumstances, the second and third images can be seen above.  When you mouse over or click on the images, those two images will move to either side. And we get to see the firs

Transparent Login Form using HTML & CSS (2022 Update)

Image
This tutorial will help you if you want to create a Transparent Login Form using HTML and CSS. However, the CSS transparent login form is much more attractive than other login designs. This login form is used to access the accounts of various websites. The login form is basically the gateway to access any website's account. Earlier I shared with you the design of many types of  Transparent Login Form . It is very simple and is basically made with HTML and CSS . The background of this login form is transparent , that is, the elements in the background are clearly visible. For this design, I have used a colorful image in the background. Everything is here as a normal login form .  Transparent Login Form This tutorial will help you if you want to create a Complete Responsive Transparent Login Form . Below I have given a preview that will help you to know how this Transparent Login Formworks. Here you will find the necessary explanations and step-by-step tutorials. See the Pen

Responsive Top Navigation Menu with HTML and CSS

Image
This tutorial will help you to know how to create a Responsive Top Navigation Menu bar . The navigation menu is an important element for any website. We see Responsive Top Navbar on different websites. Which helps to keep the various important links of the website beautifully arranged. If you are a beginner and want to know how to create a menu on top navigation then this tutorial will help you a lot. Here I have only used HTML, CSS, and very little JavaScript.  We see side menubars , full-page menubars , and stick menubars on different websites. However, the navbar is the most used. Responsive Top Navigation Menu It is very simple and is made up of only a few links and a logo. However, the bar on this CSS has been made fully responsive . This allows you to use it directly on any website or project.  In this tutorial, you will find the necessary information, source code, and video tutorial. No dropdown was used in this design. If you want to add a dropdown to this navigation bar

Responsive Image Gallery Using Flexbox and CSS

Image
If you want to create a Responsive Image Gallery using Flexbox and HTML CSS then this tutorial will help you. In this article, I have shown you how to Create a Simple Image Gallery using HTML and CSS.  I used CSS to make the gallery tutorials I shared with you more responsive . But in this case, I have used Flexbox. The use of Flexbox does not require any separate CSS to make it responsive. Flexbox helps to sort any element according to the size of the device. In this case, there are 9 images in the responsive image gallery CSS . Those images are divided into three words and three rows. Three pens can be seen in the case of the desktop. In the case of mobile, all the images can be seen in one column. Responsive Image Gallery CSS Below I provide a preview that will help you understand how this Responsive Image Gallery CSS works. With it, you can copy all the source code. See the Pen Responsive image gallery with hover effect by Ground Tutorial ( @groundtutorial ) on Co

How to Create A Custom Select Box using HTML CSS

Image
In this article, you will learn how to create Custom Select Box using HTML CSS, and JavaScript. custom select dropdown we use in many places. This is a kind of dropdown menu . However, it is much more modern than the general dropdown menu.  This type of HTML custom Select Box has a small box. Clicking on which will bring up a dropdown. There are many options in that dropdown . The option that you select will be found in that box. If you click on that box again, you will see the options again.  If you select any other option, in the same way, that option will also be seen in that custom select box . If you have a basic idea about HTML and CSS , you can easily create it.  Custom Select Box CSS Here I have used a small amount of jquery. But if you do not know jquery then there will be no problem. Because very little JavaScript has been used here. Below is a demo that will help you learn how this HTML CSS custom select dropdown works. See the Pen HTML CSS Custom Select Box by

Responsive Our Team Section Using FlexBox & CSS

Image
In this tutorial, you will learn how to create a Responsive Our Team Section using Flexbox and CSS. Earlier I shared many more types of CSS Team Section tutorials with you. But in that case, I used CSS to make it responsive. I did not use any extra CSS to make this design responsive.  Here I have taken the help of Flexbox. This Responsive Our Team Section Using FlexBox design is fully responsive so you can use it directly in your project. I took the help of Glassmorphism design to make it. The Our Team page that we have created here is absolutely simple. First, there is a profile image than a name, email id, some basic information, then two buttons, at the end there are four social media icons . Responsive Our Team Section This design is made according to the transparent i.e. Glassmorphism design . As a result, the elements in the background can be seen clearly. As I said before, the help of Flexbox has been taken here to make it responsive. I didn't have to use any CSS code

Simple RGB Color Generator Using JavaScript & CSS

Image
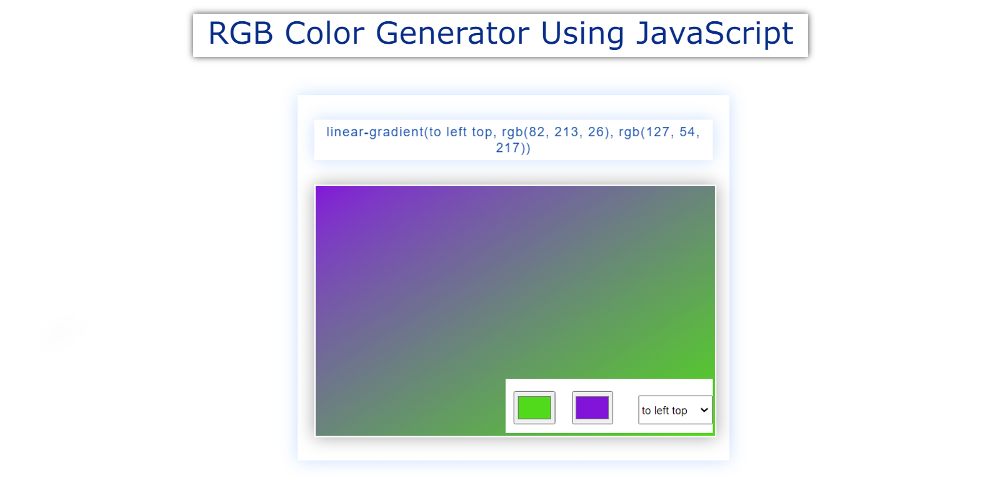
In this article, you will learn how to create RGB Color Generator using JavaScript. Earlier I shared with you the project of different types of JavaScript color generators . Some projects create background colors, some gradient colors, and some generate random colors.  Using this simple RGB Color Generator you can manually generate RGB color . It is much more modern and professional than other color generators. Here you can mix different colors together and create gradients.  This JavaScript RGB Color Generator project has various control buttons. With the help of which you can create gradients by adding colors in different ways.  JavaScript RGB Color Generator Many times I use different applications or websites to create my gradient color . In that case, such a project will help you. You can get the required code of the color you have created from here. Which you can copy directly and use as CSS code. Below I have given a demo that will help you to know how this project (RGB Color